Configuring local jupyter notebooks to use self-signed certificates on macOS Link to heading
Problem Link to heading
So, you’ve installed jupyter server locally with defaults (NO SSL) and created your python enviroment with all packages required for your projects. Let’s call this environment conda_aiml. You launch your first jupyter notebook and choose conda_aiml as it’s kernel. So far, so good.
As an example, say you now add a new cell in your notebook to download CIFAR-10 image dataset containing pictures of different objects.
Your cell would look something like this using pyTorch libraries:
transform = torchvision.transforms.Compose(
    [torchvision.transforms.ToTensor(),
     torchvision.transforms.Normalize((0.5, 0.5, 0.5), (0.5, 0.5, 0.5))])

trainset = torchvision.datasets.CIFAR10(root='./data', train=True, download=True, transform=transform)
trainloader = torch.utils.data.DataLoader(trainset, batch_size=14, shuffle=True)
testset = torchvision.datasets.CIFAR10(root='./data', train=False, download=True, transform=transform)
testloader = torch.utils.data.DataLoader(testset, batch_size=14, shuffle=False)
classes = ('plane', 'car', 'bird', 'cat',
           'deer', 'dog', 'frog', 'horse', 'ship', 'truck')
Now, at this point, your notebook cell will likely fail with an error similar to the below. This is because jupyter is serving your notebooks in http mode and torchvision package is trying to do a SSL handshake with CIFAR site, which would fail, as SSL handshake requires signed and trusted certs, which, in our case, doesn’t hold true.
URLError(SSLError(1, ‘[SSL: CERTIFICATE_VERIFY_FAILED] certificate verify failed (_ssl.c:852)’),)
So, how do we fix this? We’ll start by creating self-signed certs in the terminal using OpenSSL tool and then adding this local certificate to trusted root and then configuring jupyter to use these cert file.
Solution Link to heading
Step 1: Prerequisites Link to heading
- Install latest version of openssl using
homebrew
Please check your openssl version before installing (you may already have the latest version)
$ which openssl
<probably macos default one OR the one installed by conda>

$ brew install openssl
- Let’s ensure this latest installed version of openssl is being used system wide. We’ll simply create an alias called
openssl. You could also add it to your env files like.bashrcor.zshrcor whereever you store all your aliases.
$ which openssl
<probably macos default one OR the one installed by conda>

$ brew info openssl
<grab the path for the installed openssl - on my local computer this is where it's installed>
/usr/local/opt/openssl/bin/openssl

$ alias openssl=/usr/local/opt/openssl/bin/openssl

$ which openssl
openssl: aliased to /usr/local/opt/openssl/bin/openssl
Step 2: Making and trusting your own certificates Link to heading
Usually, making “real” certificates requires a Certificate Authority (CA) as a trusted authority. However, the only difference is that the certificates we create (self-signed) won’t be trusted by anyone else. For local development, that’s fine.
We can generate a private key and self-signed certificate for localhost with the below openssl command:
$ mkdir -p ~/.ssl
$ cd ~/.ssl

$ openssl req -x509 -out localhost.crt -keyout localhost.key \
  -newkey rsa:2048 -nodes -sha256 -days 365 \
  -subj '/CN=localhost' -extensions EXT -config <( \
   printf "[dn]\nCN=localhost\n[req]\ndistinguished_name = dn\n[EXT]\nsubjectAltName=DNS:localhost\nkeyUsage=digitalSignature\nextendedKeyUsage=serverAuth")
Adding certificate to the system certificates Link to heading
Let’s now install this new certificate localhost.crt as a trusted certificate. To do this, we’ll use the Keychain Access.app on mac.
Launch the Keychain Access.app then
- On the left nav bar, select
SystemunderSystem Keychains - On the top tab bar, select
Certificates - Click on
Create a new keychain itemicon (see screenshot below)
- Select
localhost.crtfrom the finder open window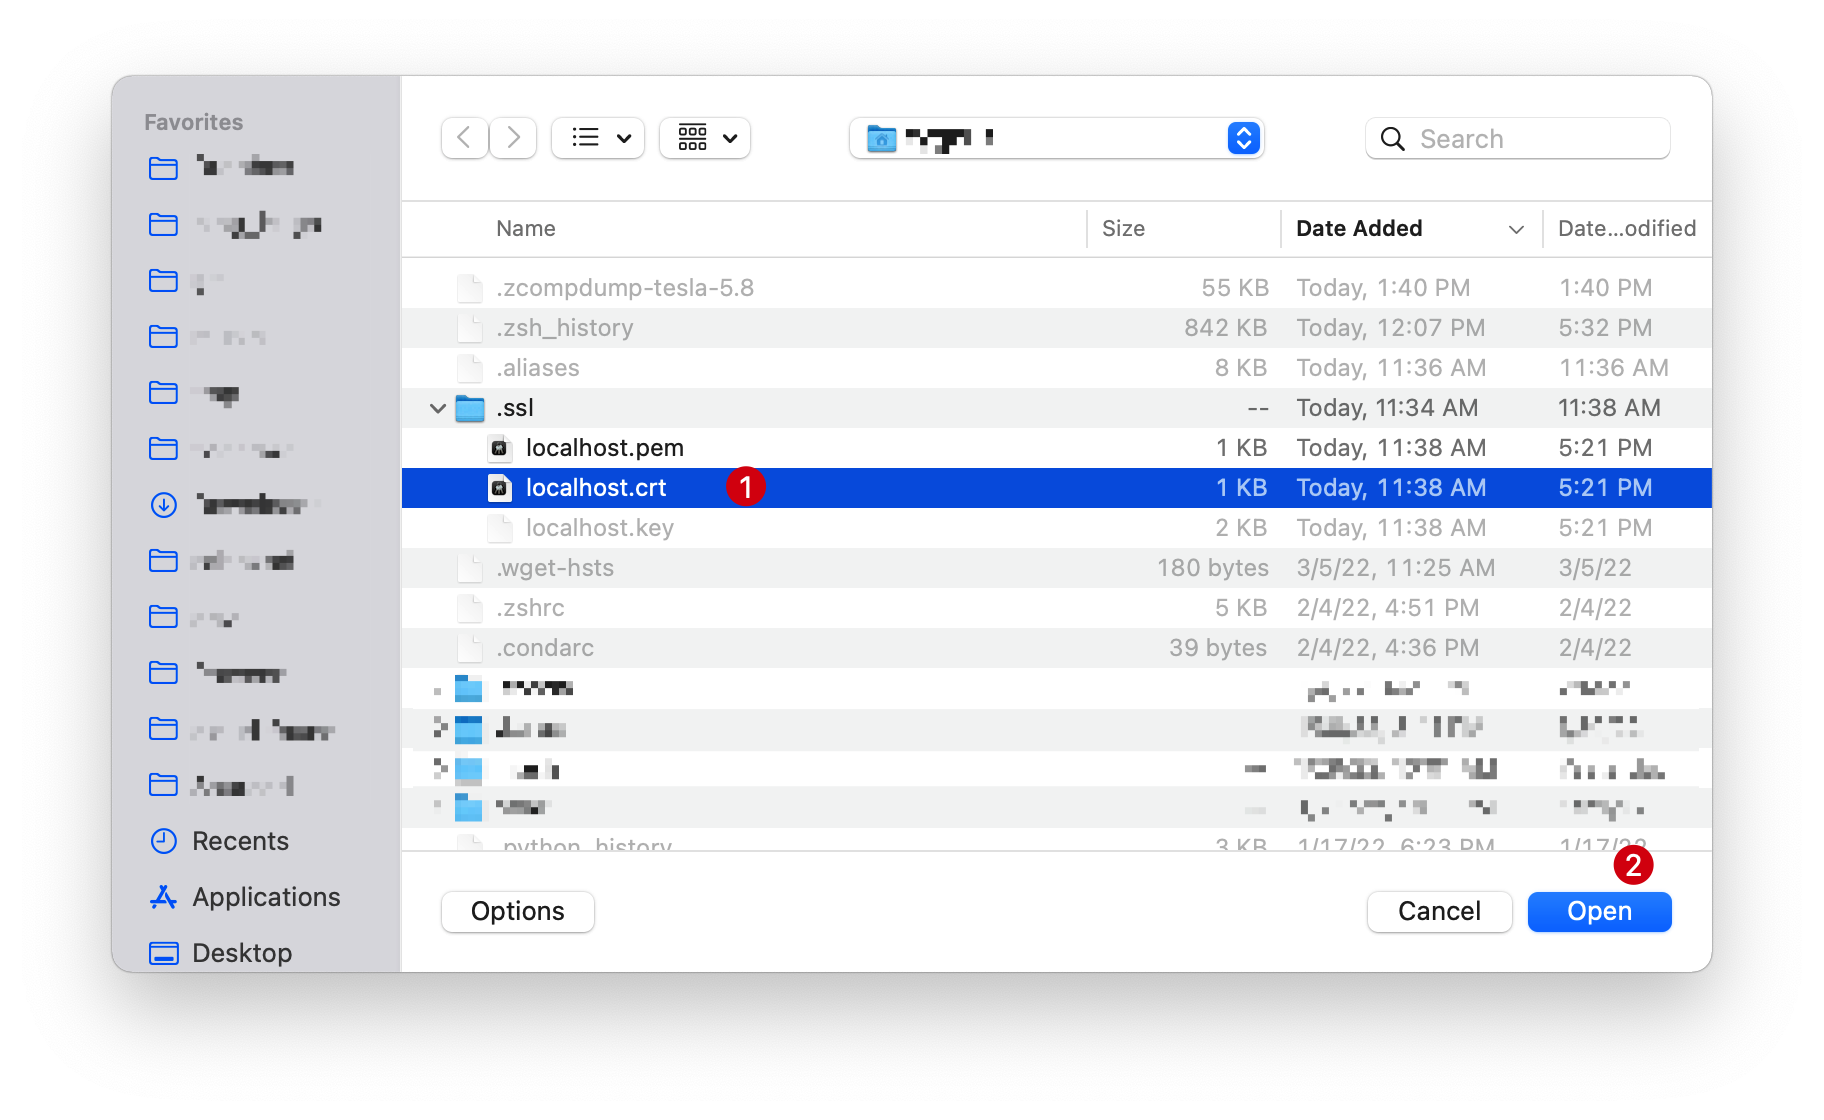
- Enter credentials and click on
Modify keychain - Double-click on the
localhost.crtcertificate. This pops-up another window - Click on
Trustto expand, then select “Always trust” from the drop-down (see screenshot)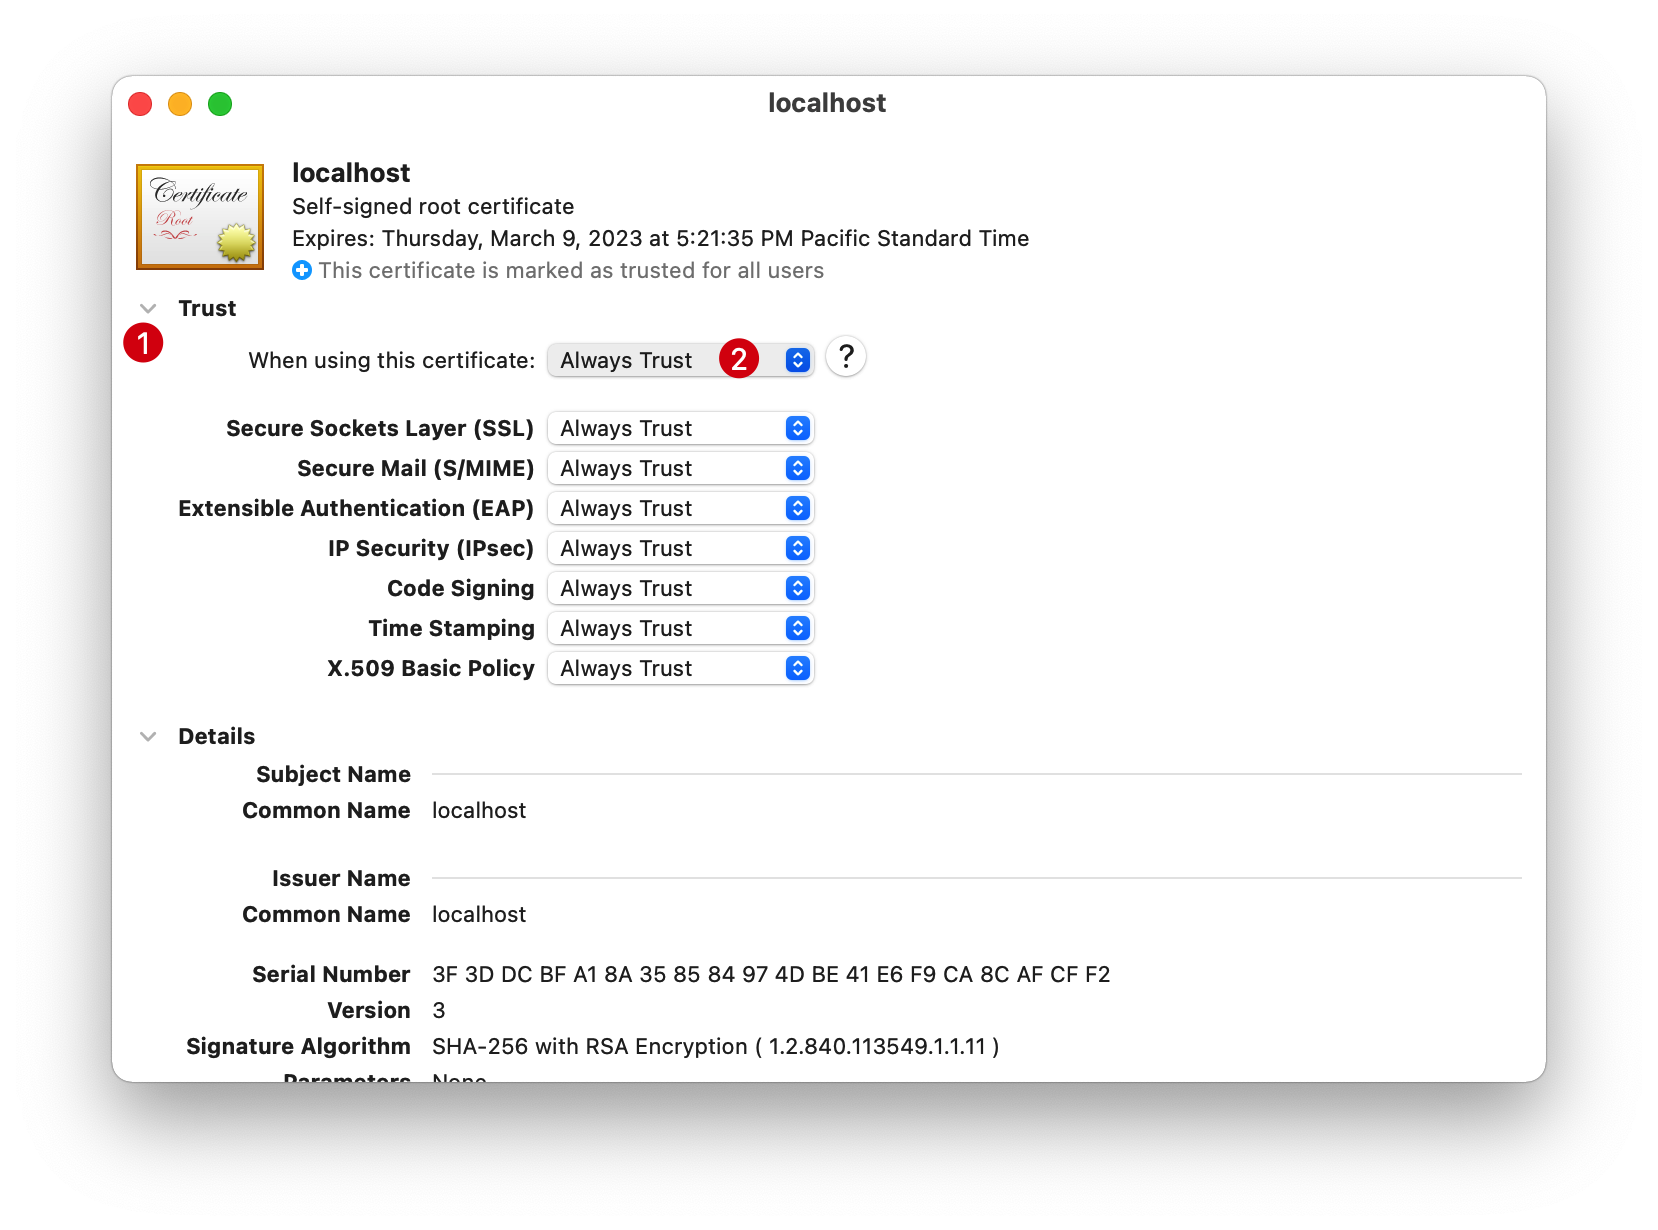
- Enter credentials again and click on
Update Settings - After you’re done your
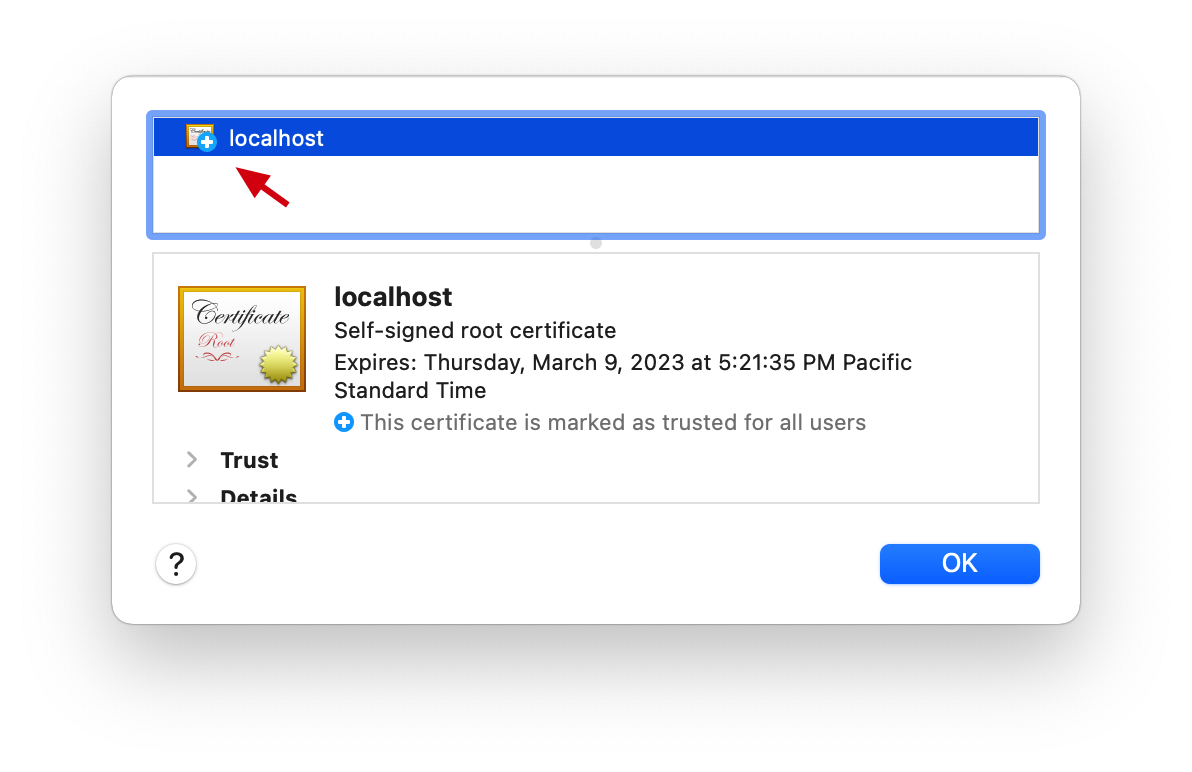
localhostcertificate should now have a blue plus icon on it indicating it’s trusted.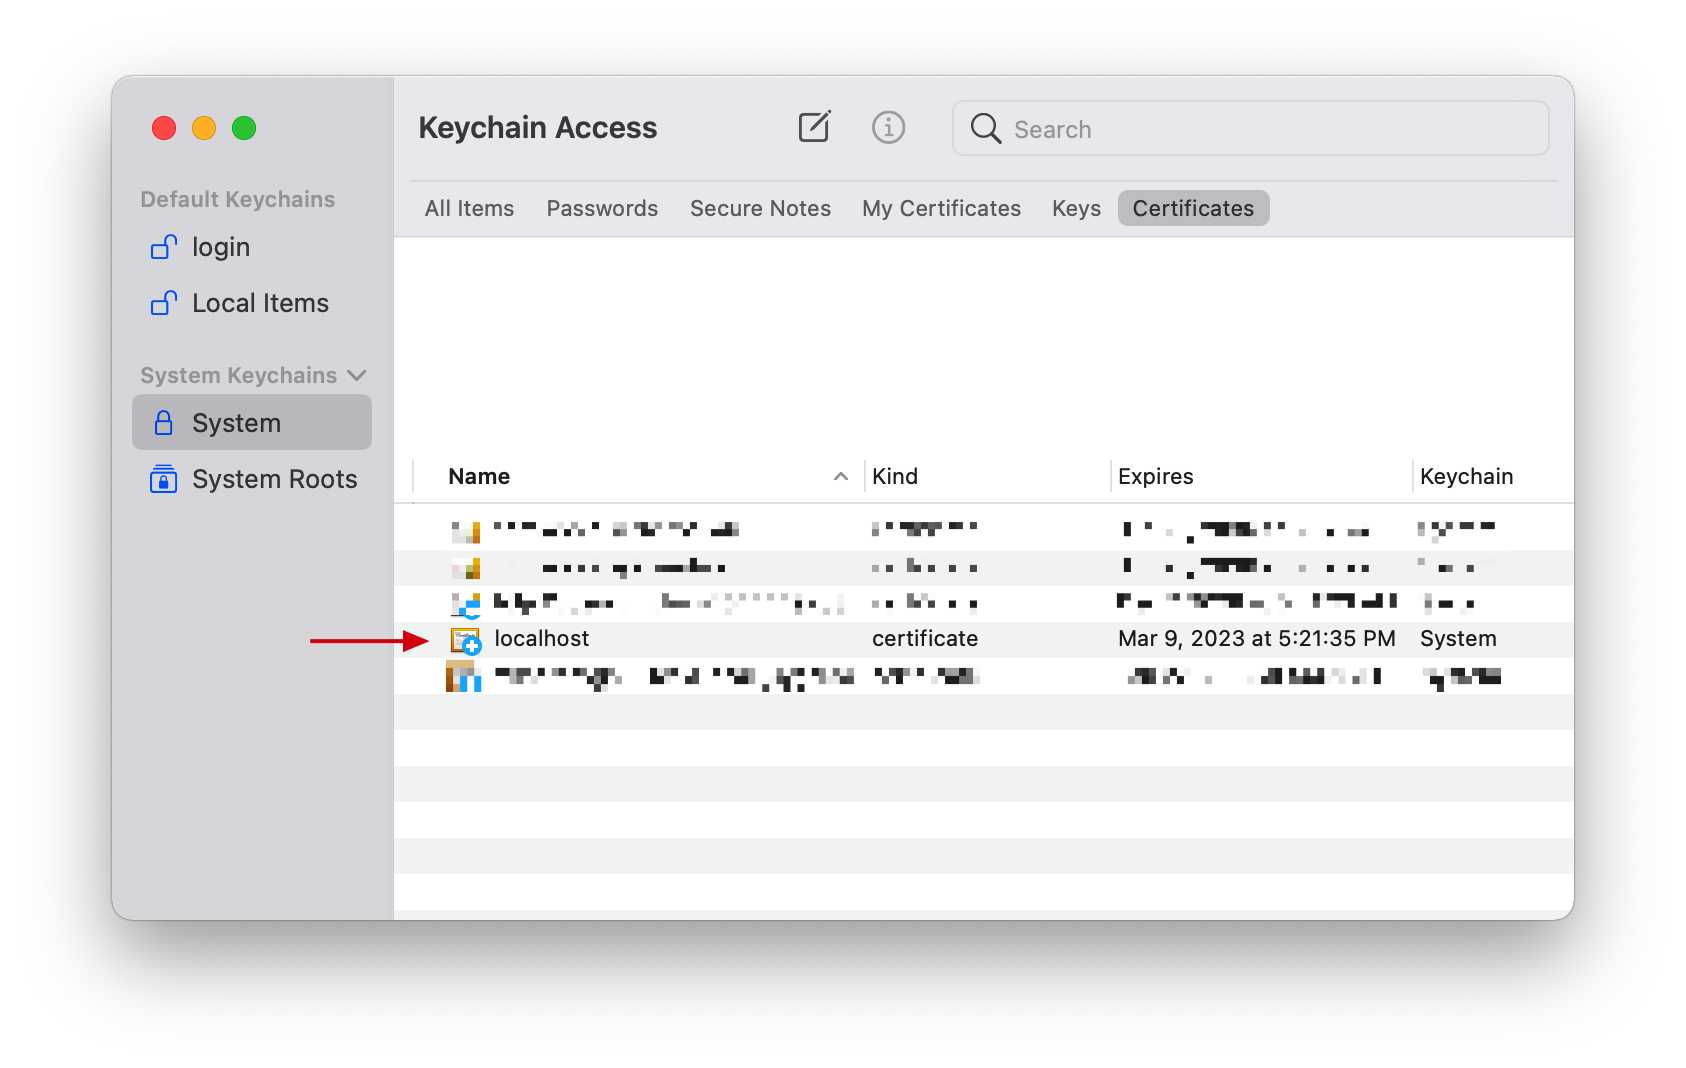
Great, now let’s move on to configure jupyter to use this self-signed cert
Configuring jupyter with self-signed cert Link to heading
If you already have config generated for your jupyter notebook then skip this step, else:
jupyter notebook --generate-config
This generates a jupyter_notebook_config.py file under ~/.jupyter folder.
Now, let’s also create an empty jupyter_notebook_config.json file:
$ pwd
~/.jupyter

$ echo "" >> jupyter_notebook_config.json
now edit the jupyter_notebook_config.json file and add the below lines (replace /users/admin/ with your home directory accordingly). Save and close the file
{
    "NotebookApp": {
      "notebook_dir": "/users/admin/",
      "certfile": "/users/admin/.ssl/localhost.crt",
      "keyfile": "/users/admin/.ssl/localhost.key",
    }
}
you can also add other directives to this json file but let’s keep only these first and ensure our SSL works.
Time to test Link to heading
Now when you launch jupyter you should see that your notebooks are now being served with https
$ jupyter notebook --log-level=ERROR --notebook-dir=.

[W 2022-03-09 13:23:11.900 LabApp] 'notebook_dir' has moved from NotebookApp to ServerApp. This config will be passed to ServerApp. Be sure to update your config before our next release.
[W 2022-03-09 13:23:11.900 LabApp] 'certfile' has moved from NotebookApp to ServerApp. This config will be passed to ServerApp. Be sure to update your config before our next release.
[W 2022-03-09 13:23:11.900 LabApp] 'keyfile' has moved from NotebookApp to ServerApp. This config will be passed to ServerApp. Be sure to update your config before our next release.
[W 2022-03-09 13:23:11.901 LabApp] 'password' has moved from NotebookApp to ServerApp. This config will be passed to ServerApp. Be sure to update your config before our next release.
[W 2022-03-09 13:23:11.901 LabApp] 'password' has moved from NotebookApp to ServerApp. This config will be passed to ServerApp. Be sure to update your config before our next release.
[I 2022-03-09 13:23:11.911 LabApp] JupyterLab extension loaded from /usr/local/anaconda3/lib/python3.9/site-packages/jupyterlab
[I 2022-03-09 13:23:11.912 LabApp] JupyterLab application directory is /usr/local/anaconda3/share/jupyter/lab
[C 13:23:11.926 NotebookApp]

    To access the notebook, open this file in a browser:
        file:///Users/*******/Library/Jupyter/runtime/nbserver-****-open.html
    Or copy and paste one of these URLs:
        https://localhost:8889/?token=307e3a7912e8d31edacb85cf36f9784ccf8b94c65046cc59
     or https://127.0.0.1:8889/?token=307e3a7912e8d31edacb85cf36f9784ccf8b94c65046cc59
Your browser should show a secured icon when you navigate to https://localhost:8888
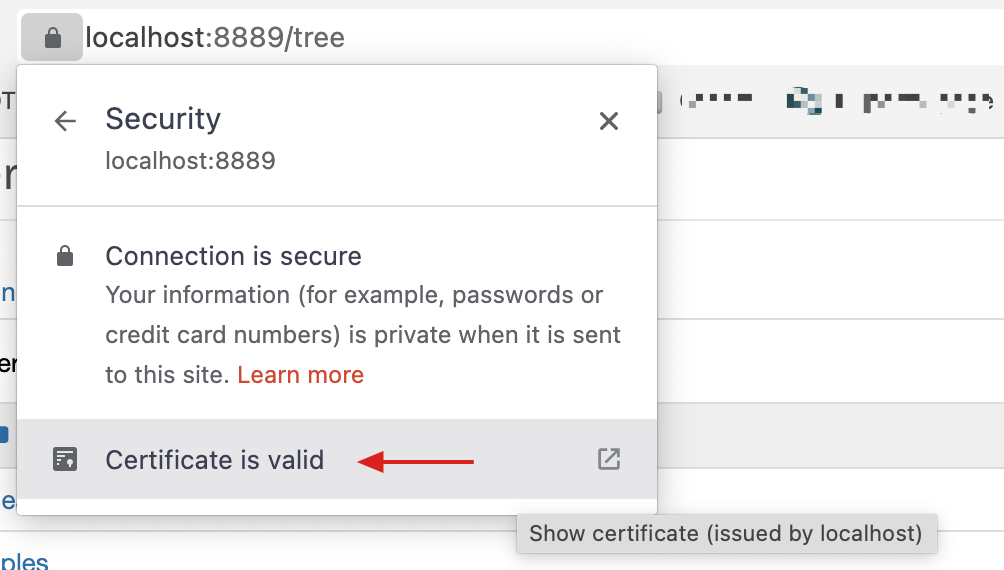
and when you click on the certificate it should popup your localhost trusted cert